Hi! My name is Emily Urban. I’m the voice of our social media (follow us!) and am so excited to be showing you how to make the second ODIY – Omega Do-It-Yourself – of the month! I’ve searched through Pinterest and found easy, yet beautiful-looking crafts, because if you’re like me, you have limited time, money, and you aren’t what I affectionately call a Pinterest guru – someone that can make gorgeous, complex things effortlessly out of thin air. 🙂
I’m calling these crafts ODIYs – for Omega Do-It-Yourselfs, of course. Share your results with #ODIY!
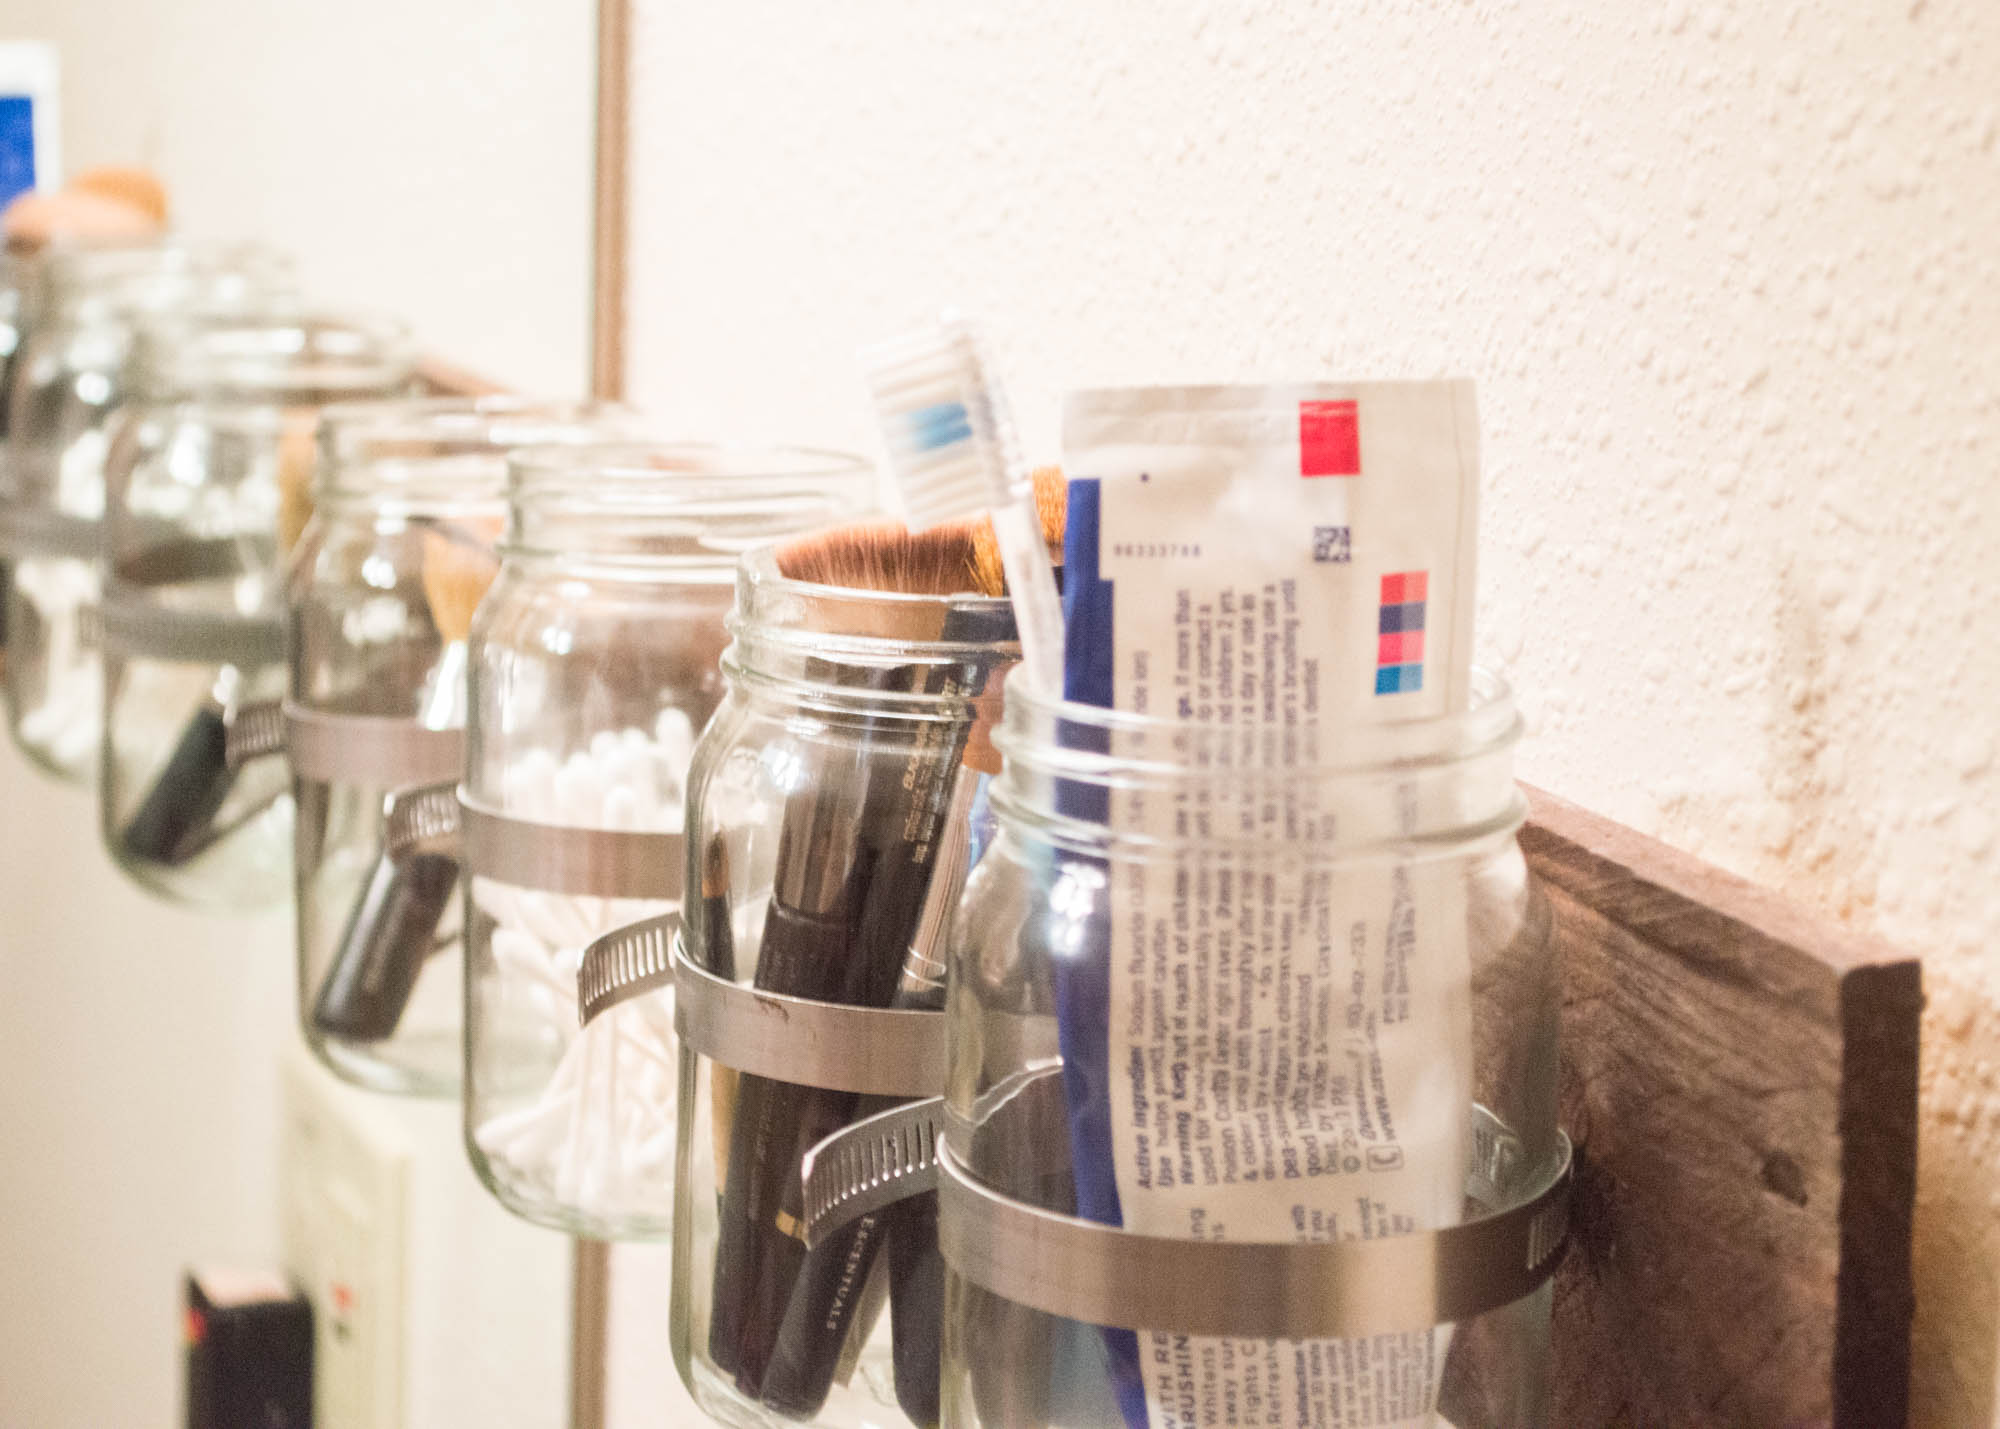
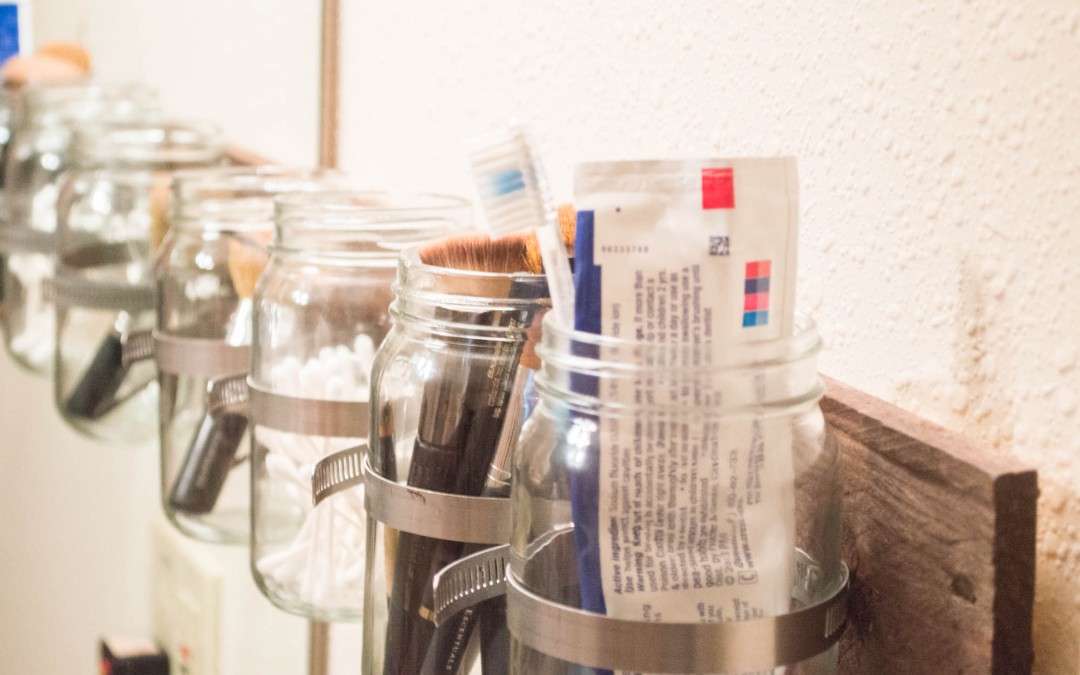
If you’ve been on Pinterest, you know all about the Mason jar craze. It seems like 50% of the crafts on Pinterest involve them! And I have to admit… I’m roped right in. I love the look. It’s a mix of clean and rustic, minimal and decorative. And this craft is one that I’ve been wanting to do for ages! It’s a nifty little storage or decor piece for your bathroom, kitchen, or really anywhere!
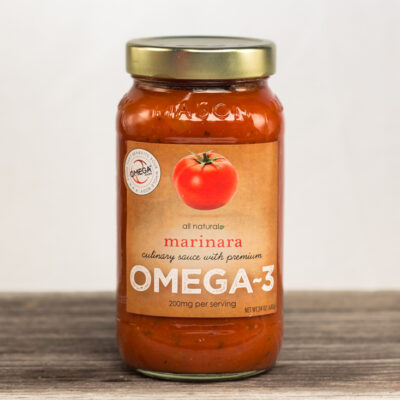
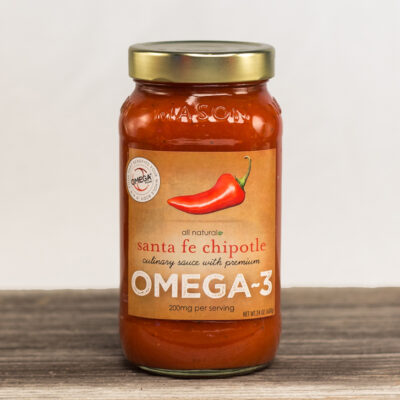
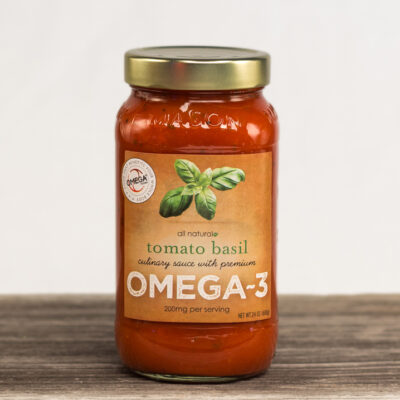
Omega Foods uses actual Mason jars for our Culinary Sauces, too, so you know you’re using a high quality material. It’s beautiful and has plenty of room to store things.
My friend Tamara joined me in this project. She’s particularly fond of the Santa Fe Chipotle sauce and loves doing crafts in her spare time! I thought it’d be great to utilize her creative know-how.
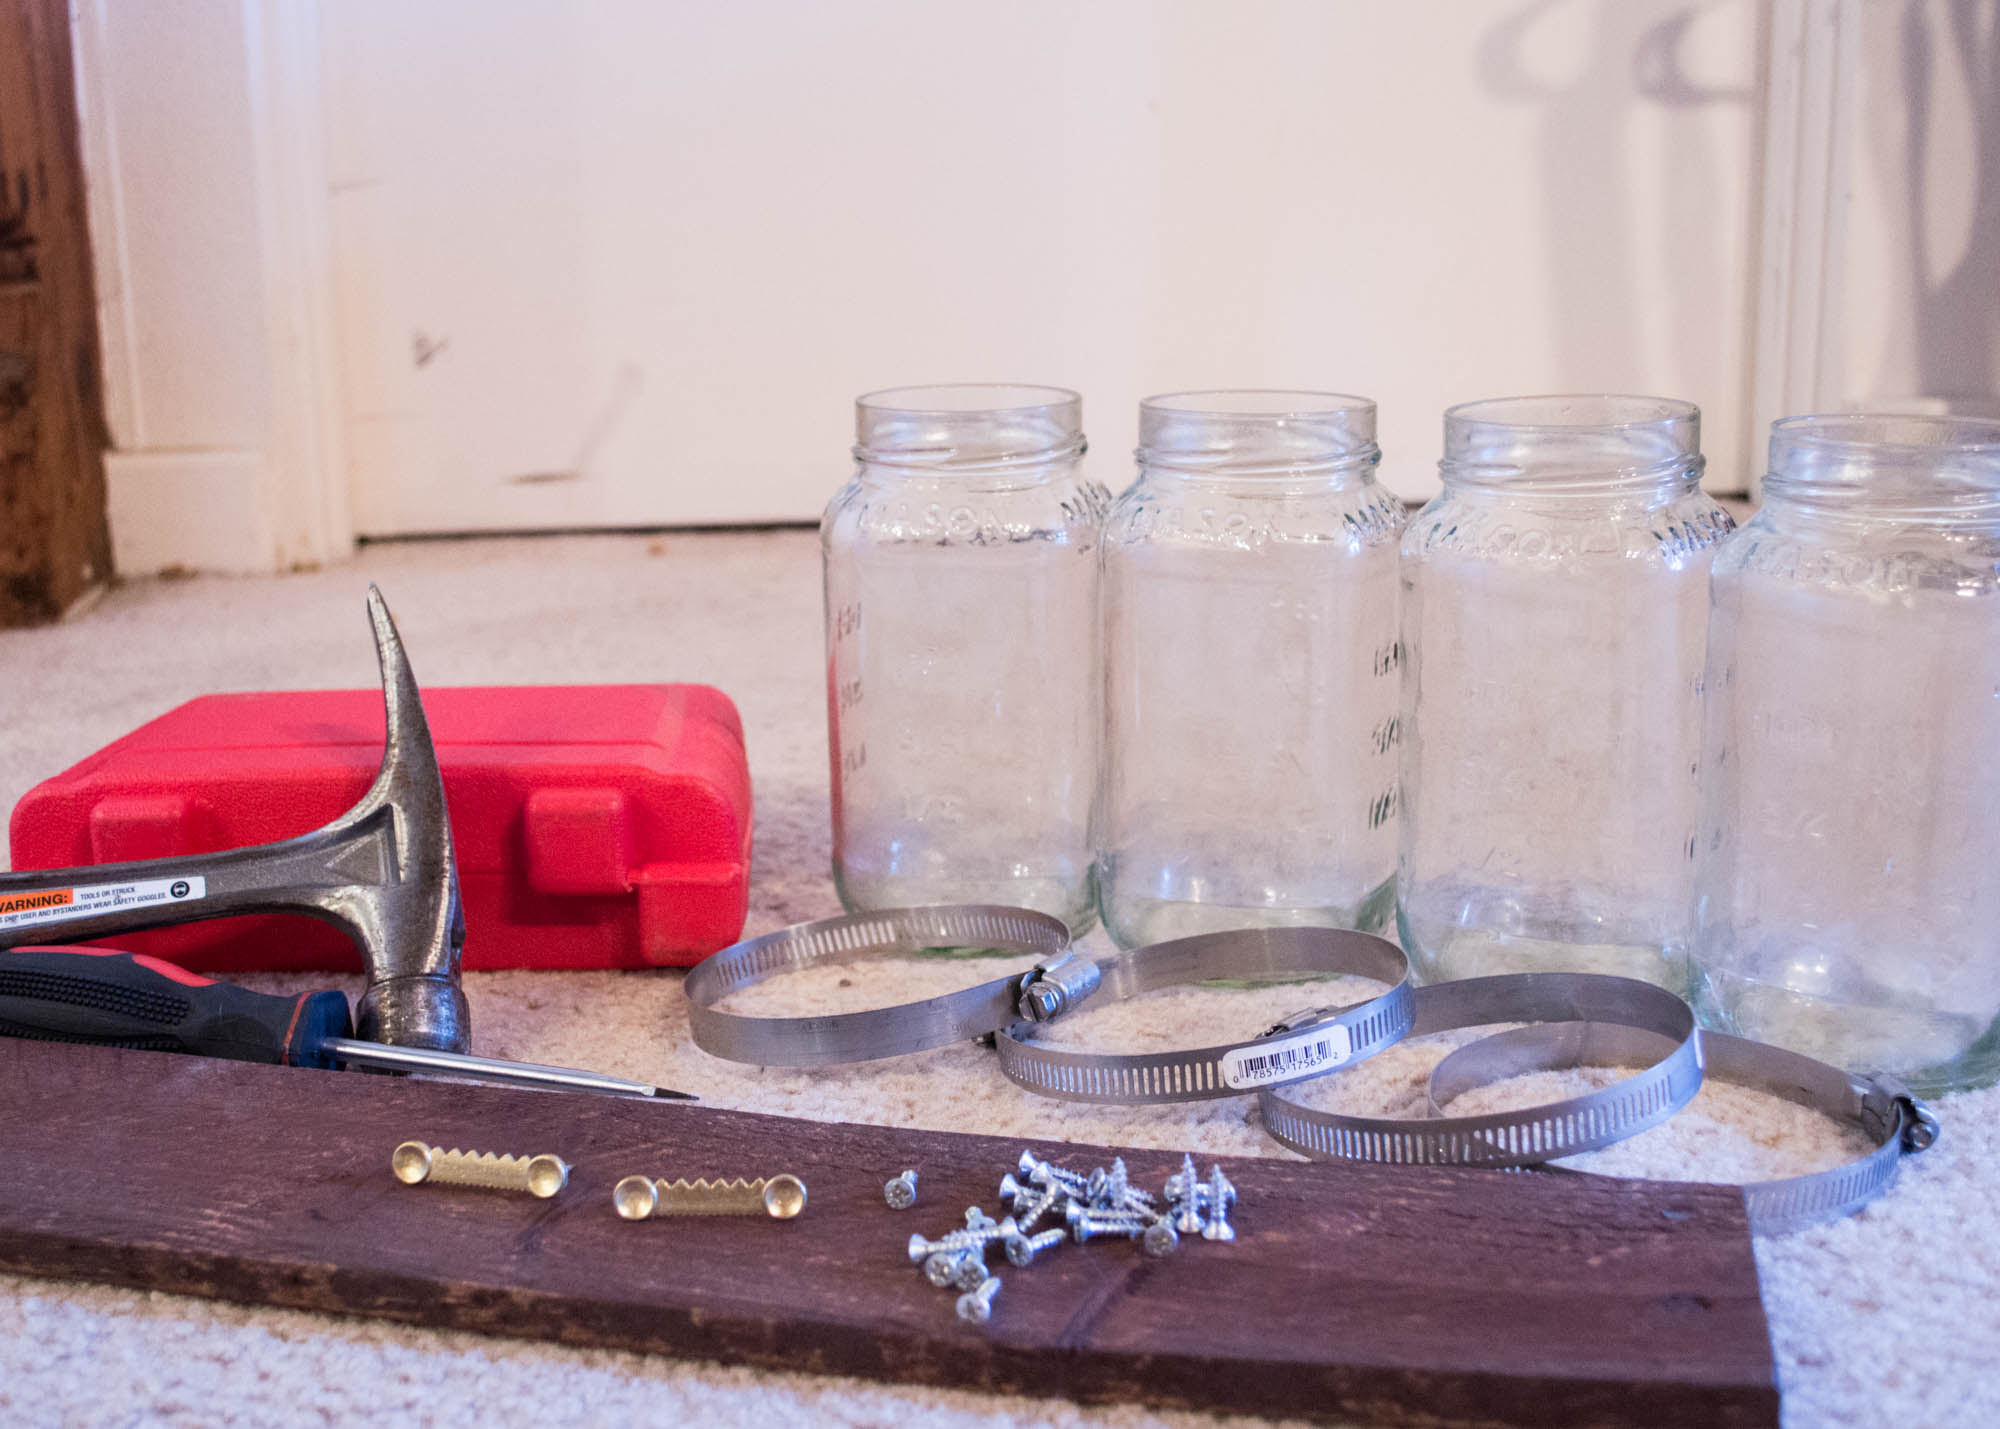
Here’s what you’re going to need:
- A plank of wood cut to desired length. Make sure it has enough space for all your jars with some extra breathing room! (we got pallet wood from Home Depot, $1 a pallet. Just walk in and ask for some! If they have it, they’ll gladly give you some!)
- Wood stain (optional)
- Omega Foods Culinary Sauce Mason Jars (I recommend 3-4. I used four on mine!)
- Hose clamps (also at Home Depot – make sure they’re large enough!)
- Two sawtooth picture hangers (I found these super strong ones at Walmart that you can just push in or hammer in without screws)
- #6 5/8″ flathead screws (they need to be short enough so they don’t go through the wood!)
- Screwdrivers (one flathead and one Phillips head)
- Hammer
- Drill (optional, I suppose, but recommended)
Let’s get started!
Thoroughly wash the jars and remove the labels. Here’s a tutorial on how to do that! Let them dry.
Prepare the wood by thoroughly sanding it and staining it if you like!
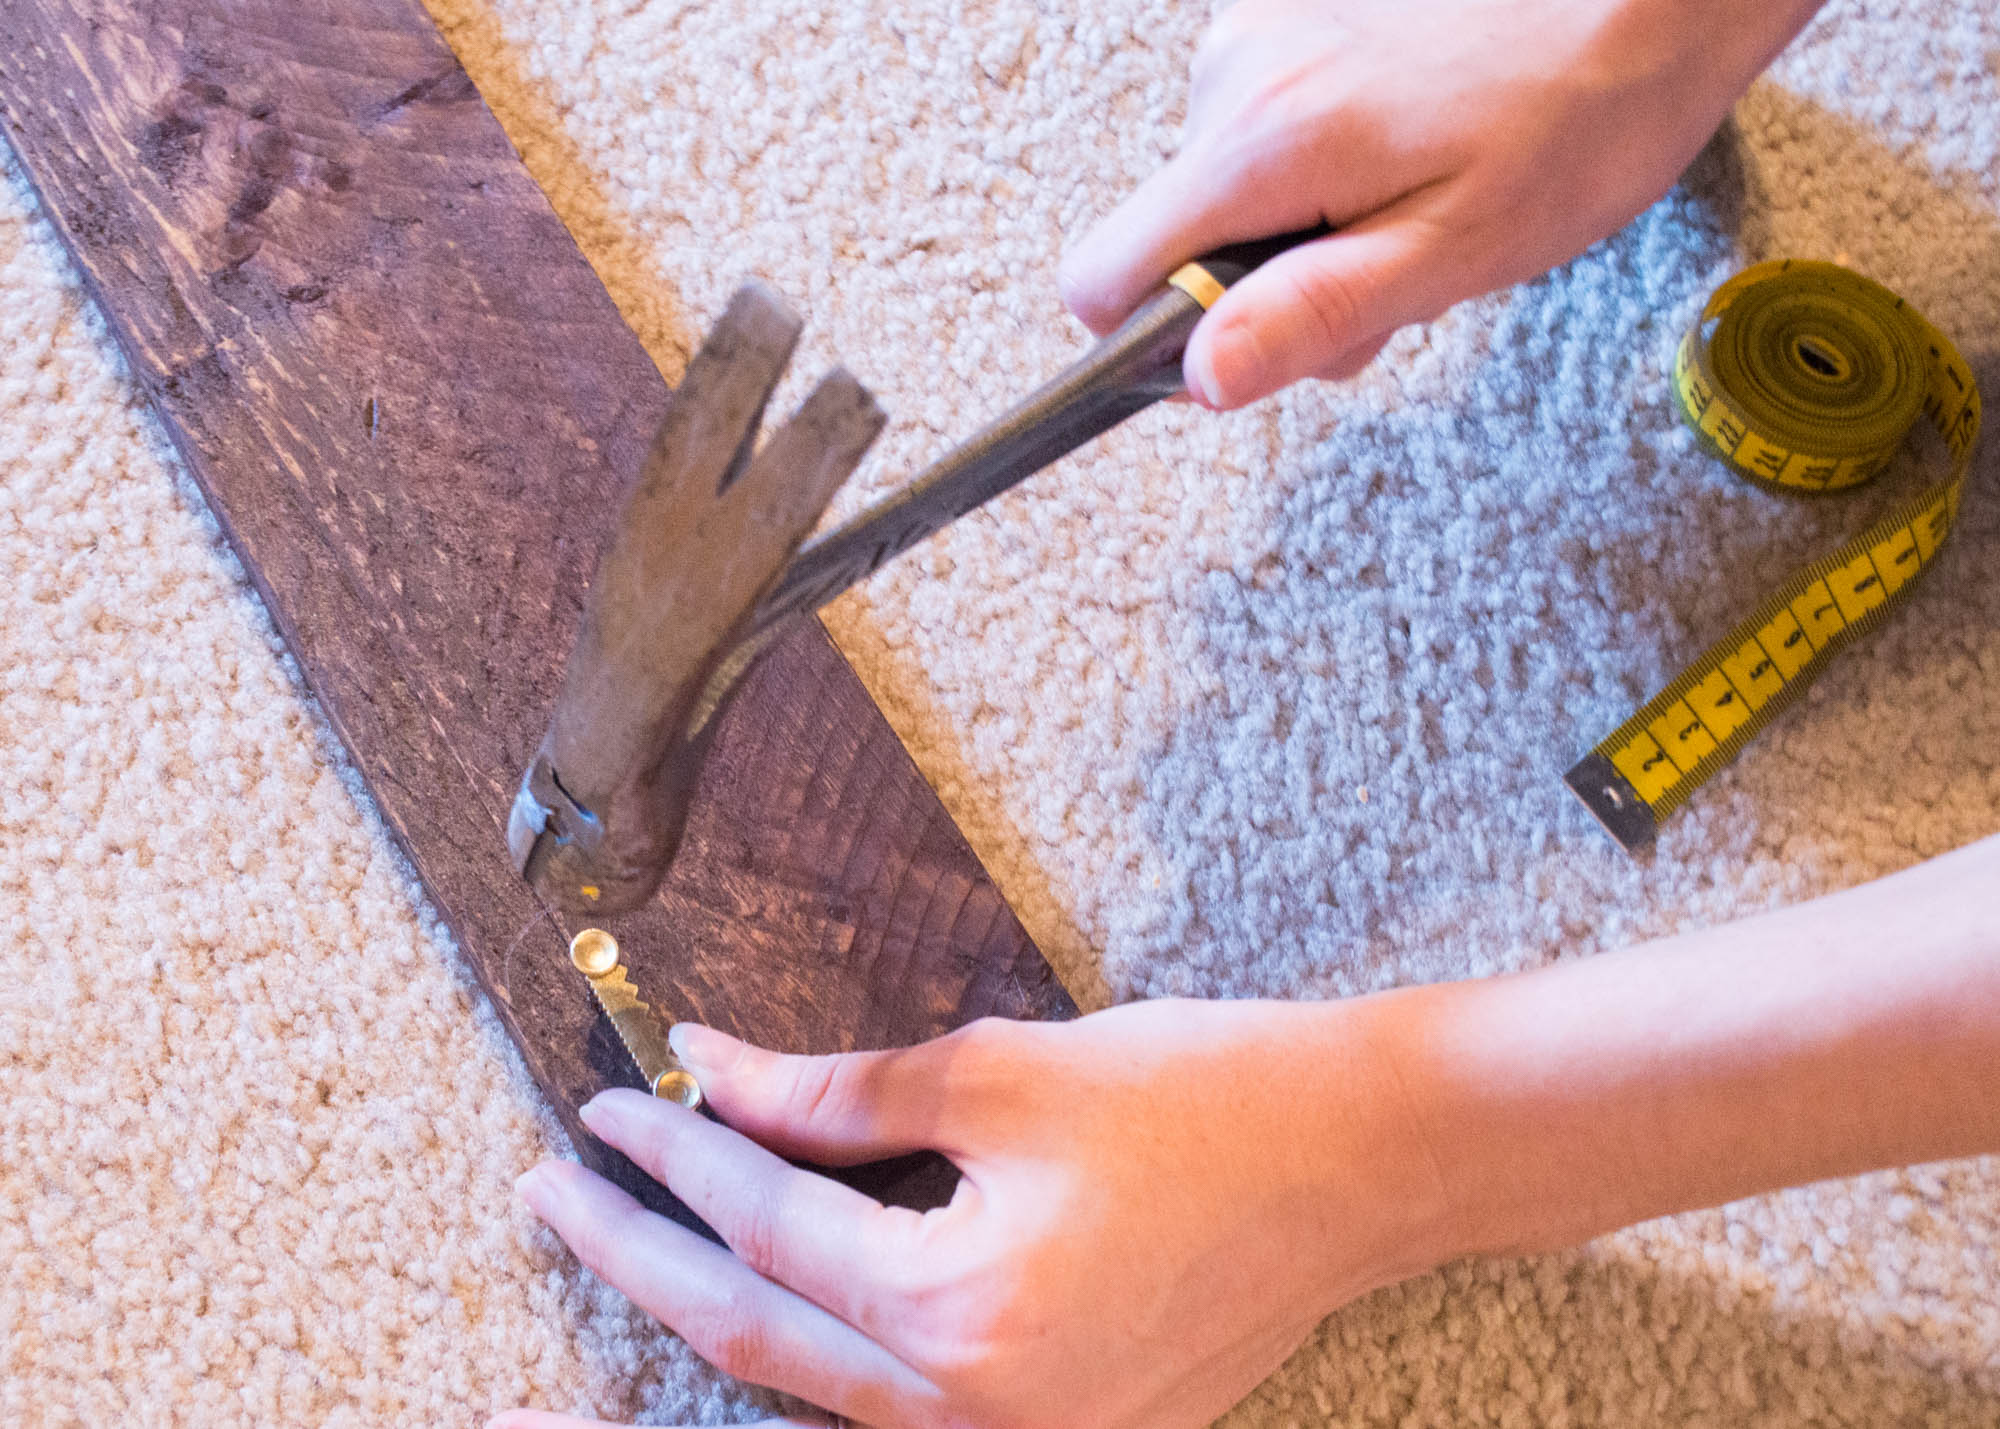
Push or hammer the picture hangers onto the back of the wood. Make sure they’re at the same height and about equidistant from each other. I recommend an inch from the top and an inch from each edge.
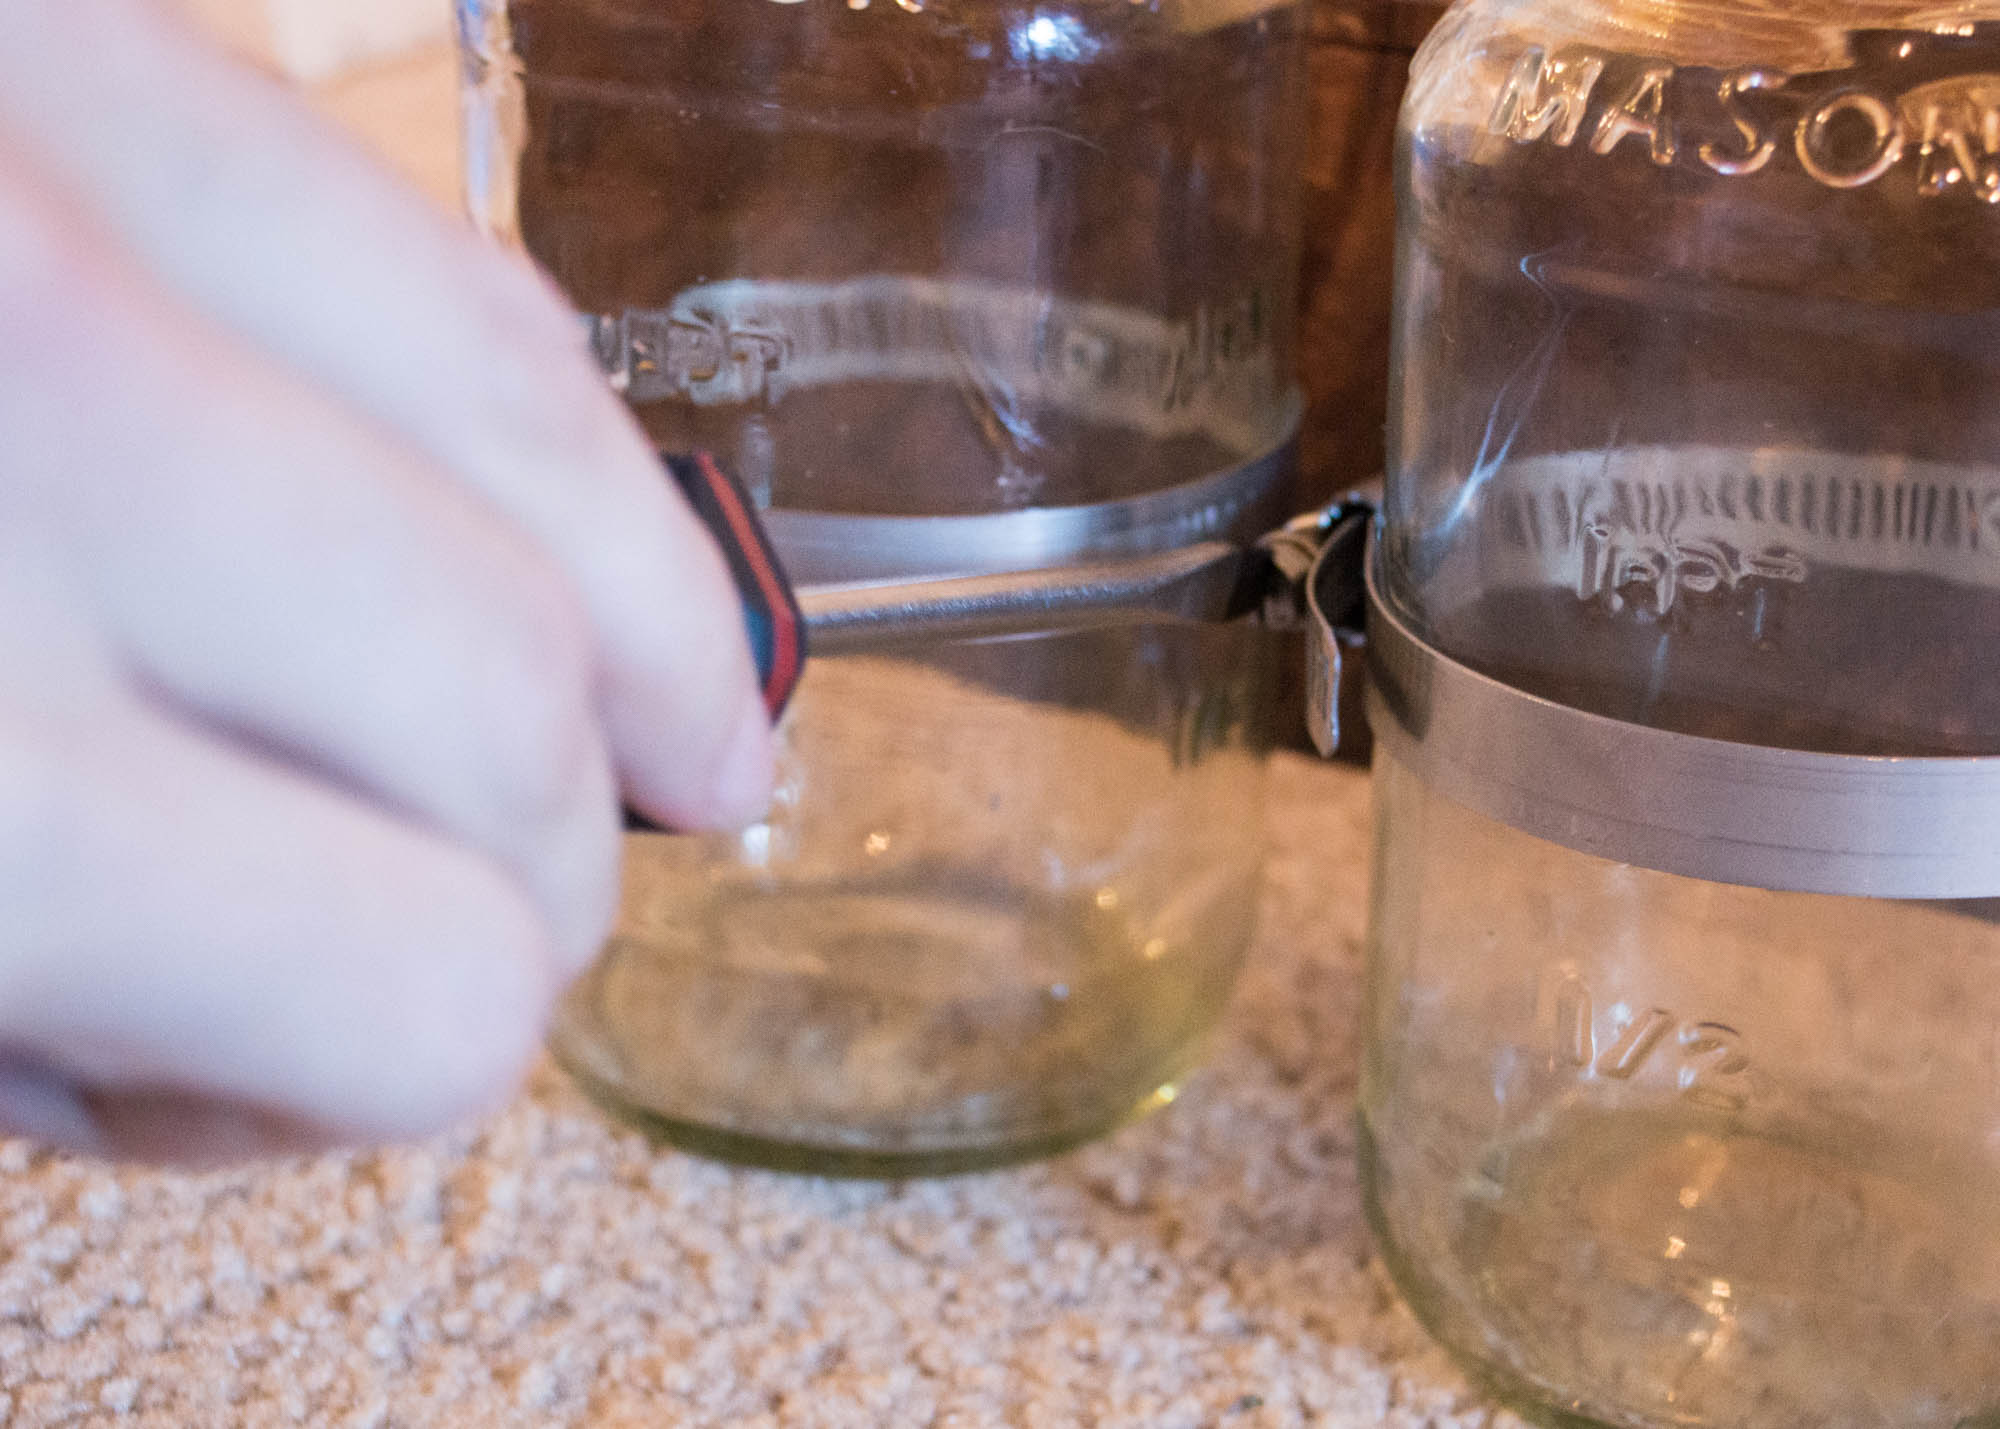
Fit the hose clamps to the jar. Don’t make it too tight just yet. Make it tight enough to be fitted to the jar, but loose enough so you can still wiggle it off.
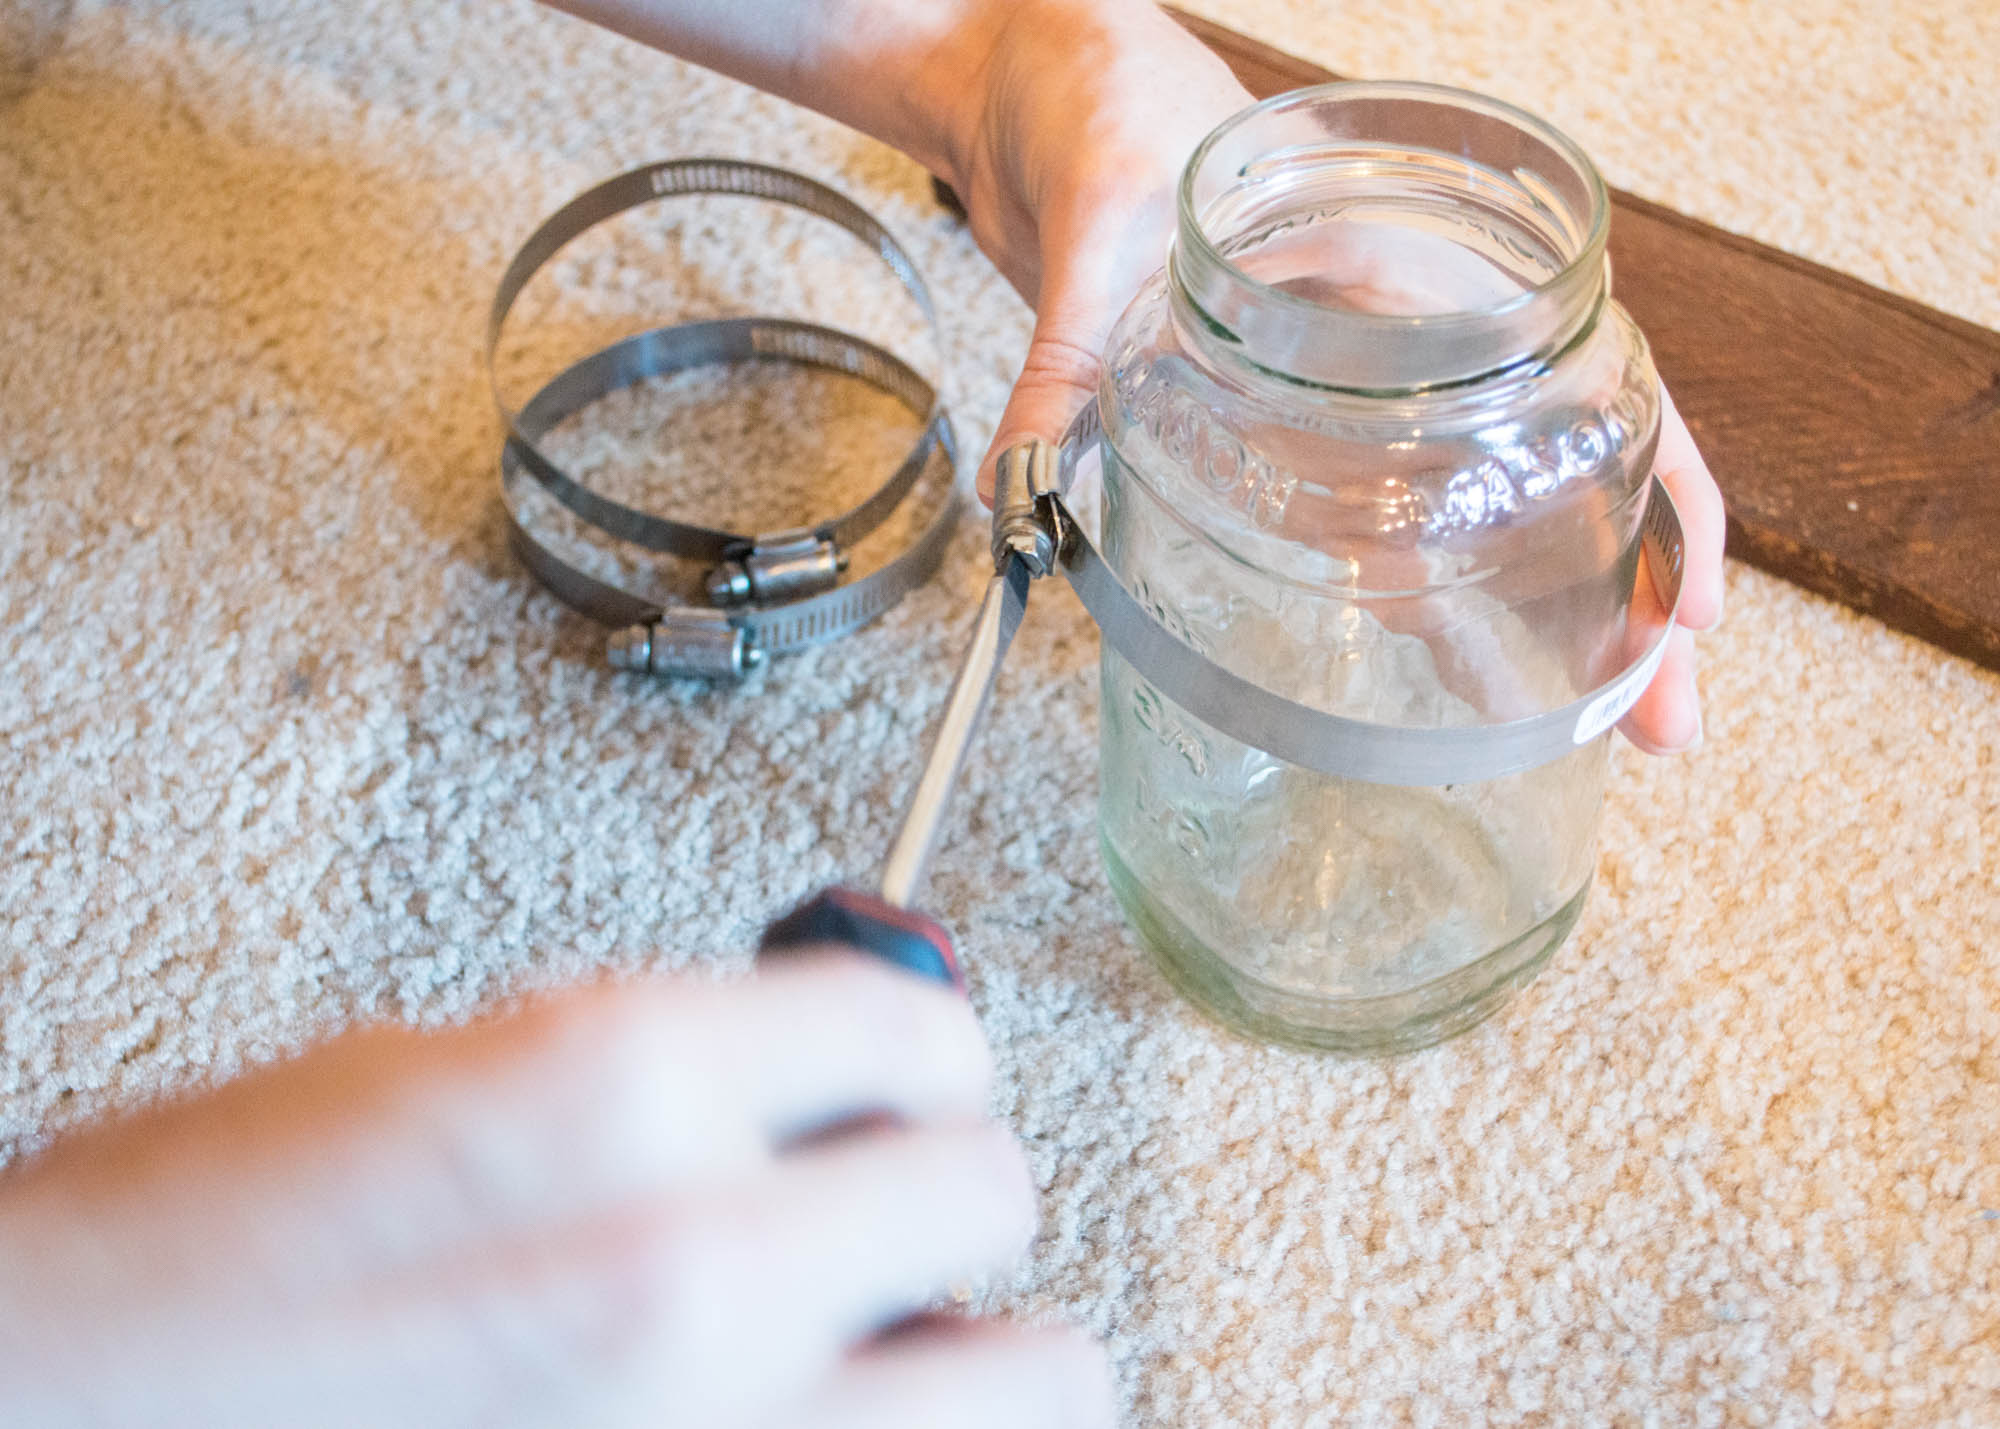
(Psst…. We used the drill with a Phillips head to make it go faster.) 🙂
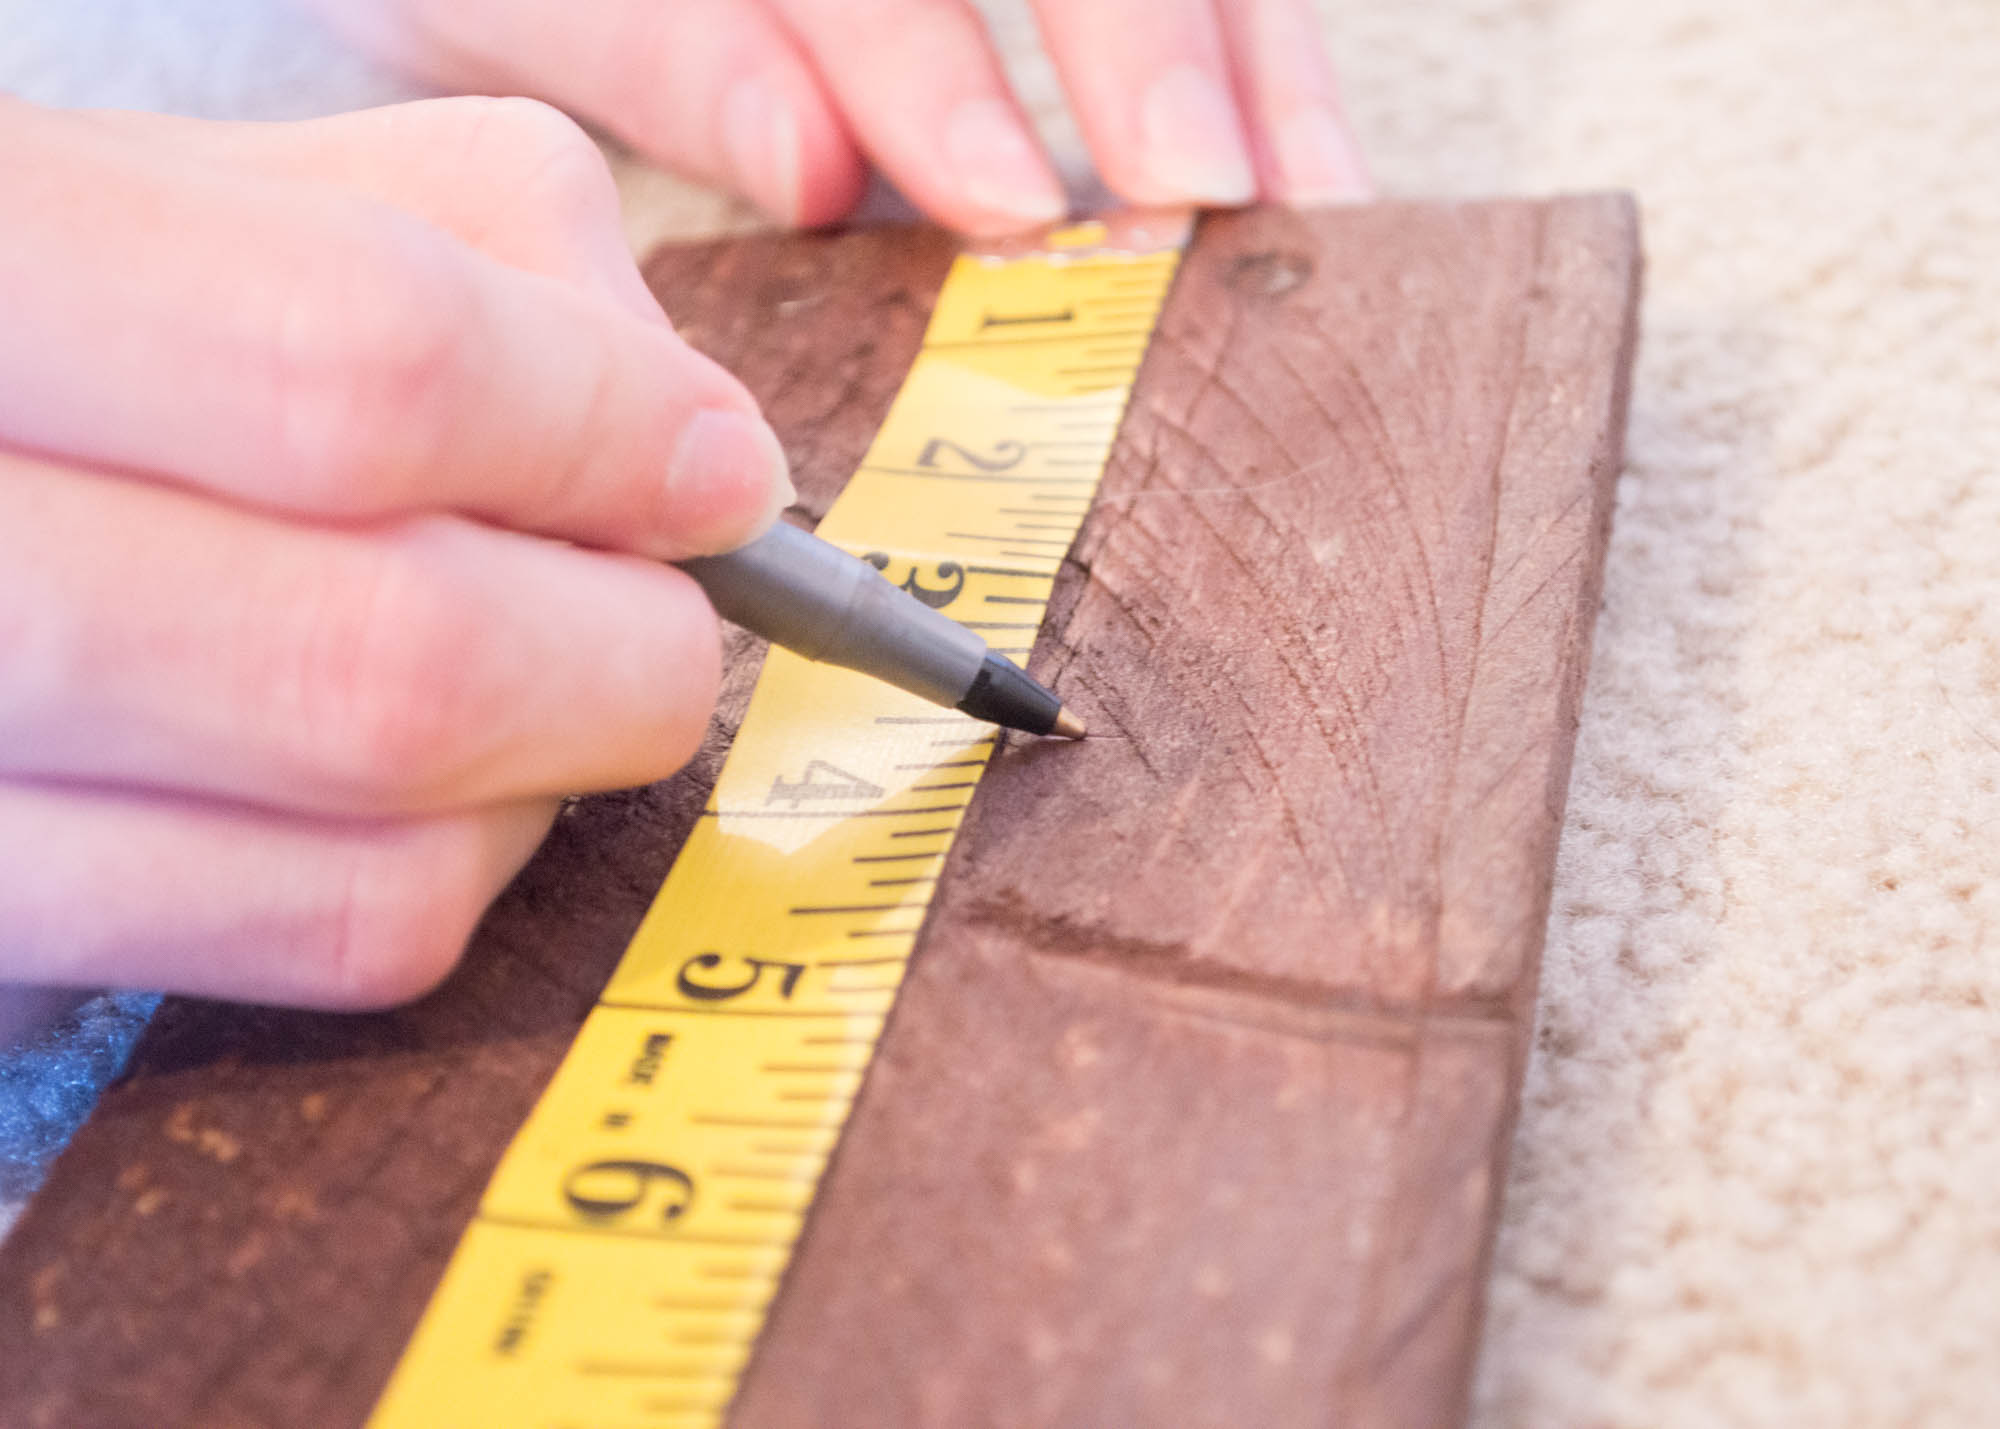
Next, measure out where you’ll center the jars. I found the length of 3.5-4 inches between each dot gives just enough room. Double and triple-check to make it perfect!
Mark with a pen or pencil where the screw will go. Center it vertically.
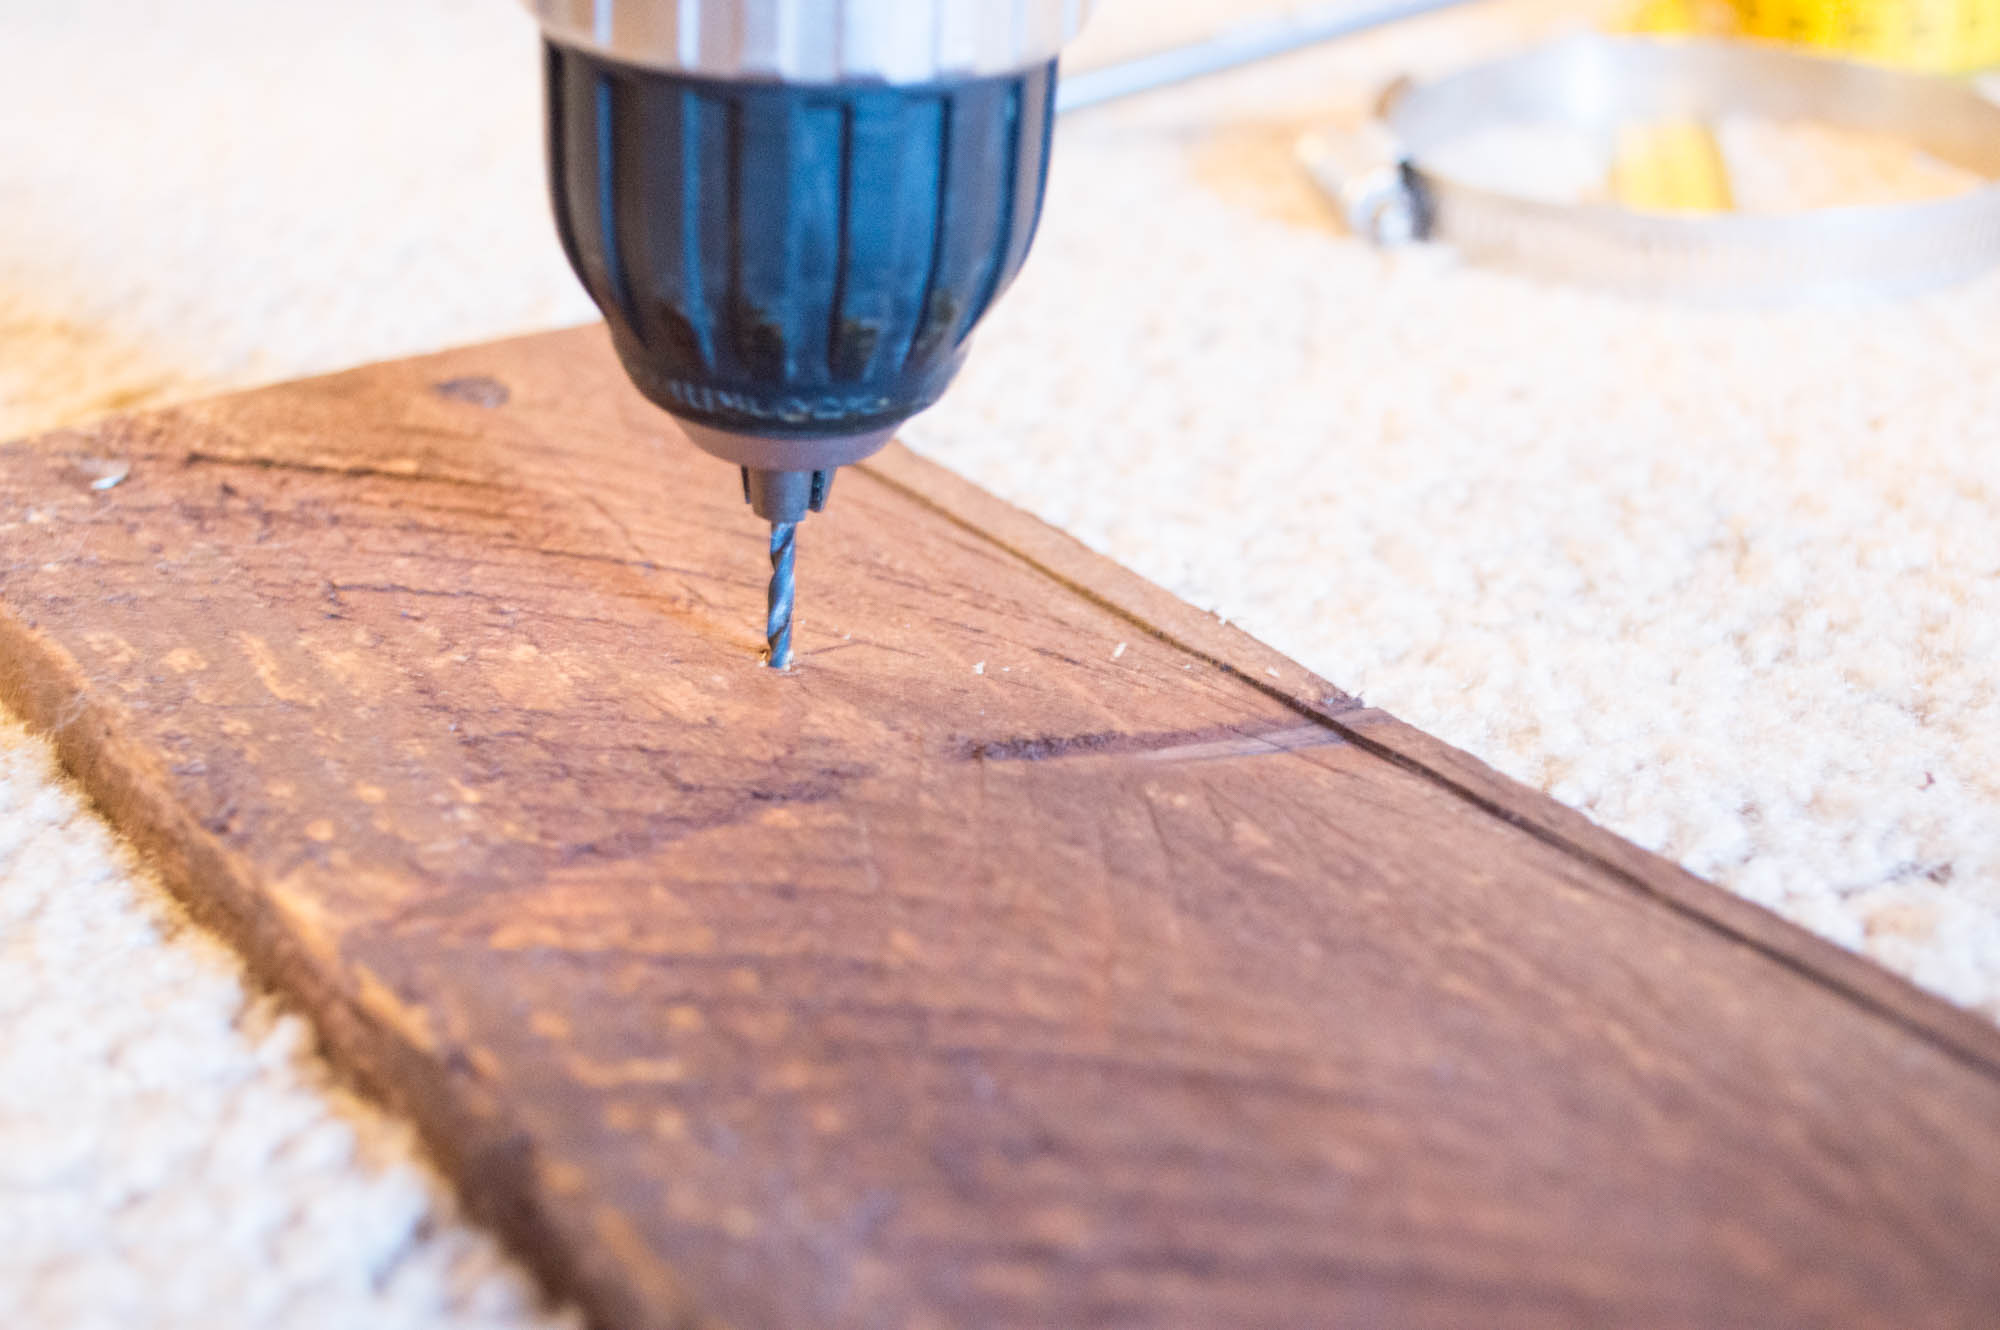
Next, use the drill to get a hole started. Don’t drill very deeply, because we want the screws tight so the jars are secure!
We used a 3/32 bit.
This next part takes a little elbow grease.
Okay, a lot of elbow grease. By the end, I broke a sweat. But don’t give up – you can do it!
Take the hose clamp and rotate it so that the tightening part is perpendicular to the wood. Line it up with the first hole you’ve made. Then, take a screw and your screwdriver, and screw the screw through the metal. You will have to press hard as you tighten, and once you get it through the metal, the screw will be stuck and you should be able to realign the clamp before you drill into the wood.
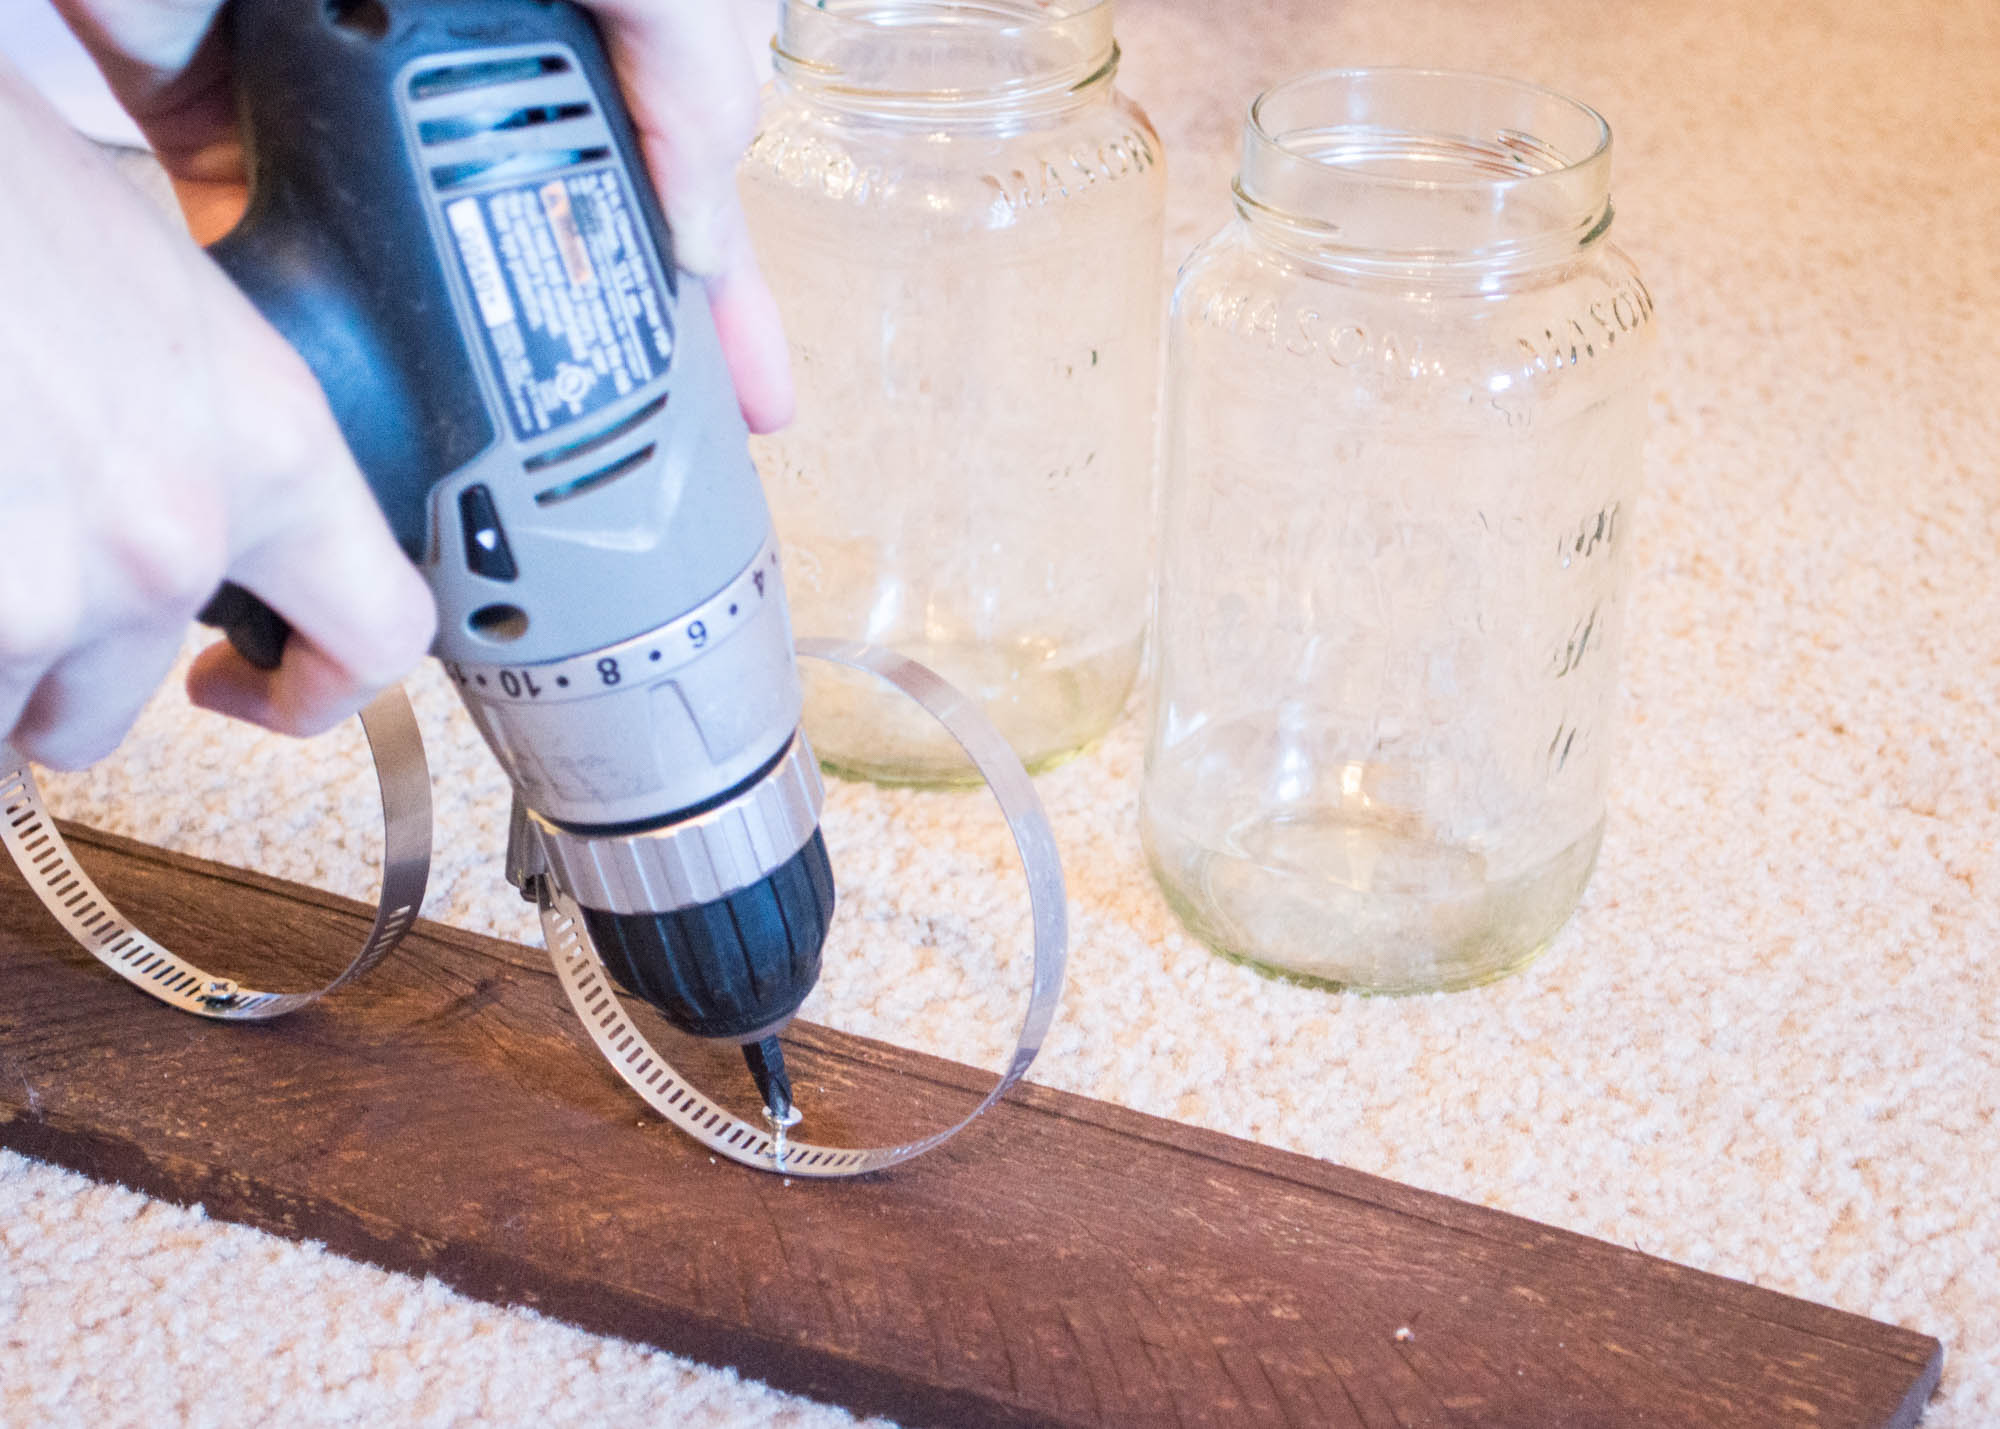
Once you’ve got it through the metal and realigned, use your drill to drill the screw into the wood. Use your screwdriver to tighten as much as possible. Repeat for the remaining hose clamps.
Now the best part! Slip the jars back into the loops one by one and tighten the clamps completely.
Make sure they’re all at the same height. Here’s a tip: slide them in standing up, so they’re all on the even surface you’re working on. Clamp from there.
And there you have it! My friend used hers for her bathroom supplies. I think I’ll use mine for flowers in my living room. My mom wants to make her own for kitchen utensils. The versatility is spectacular and possibilities are endless! Let us know how you use yours on Facebook or Twitter at @omegafoods. Use the hashtag #ODIY! Get more of the omegas you need – and a more personalized, comfortable home. 🙂
See you next week for our last project this month!